How to Share ODBClink on Network
Jump to navigation
Jump to search
Please follow these instructions to move the ODBClink folder to a new location.
- Locate the ODBCLink Folder to move;
- Move ODBClink to the new location in the Network;
Please follow these instructions to share the ODBClink folder on Network.
- Right-click the item you want to share, click Share with, and then click Specific people.
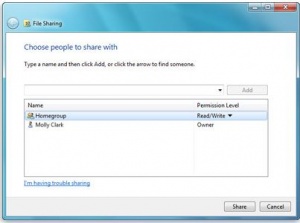
- In the File Sharing wizard, do one of the following:
- If your computer is on a domain, click the arrow next to the text box, and then click Find people. In the Select Users or Groups dialog box, type a name in the box, click Check Names, and then click OK.
- If your computer is part of a workgroup, click the arrow next to the text box, click a name from the list, and then click Add.
How to give Permissions to the folder
Under the Permission Level column, select one of the following options:
- Read. Recipients can open—but not modify or delete—the file.
- Read/Write. Recipients can open, modify, or delete the file.
- When you're finished adding people, click Share. If you're prompted for an administrator password or confirmation, type the password or provide confirmation.
- After you receive confirmation that your item is shared, you can let people you've shared with know how to access it. Do one of the following:
- If you have an e mail program installed, click e mail to send someone a link to your shared files.
- Click copy to automatically copy the displayed link to the WindowsClipboard. Then you can paste it into an e mail, instant message, or other program.
When you're finished, click Done.
