How to install BudgetLink on Sharepoint
Jump to navigation
Jump to search
BudgetLink requires files to always be available on the system to run.
For BudgetLink to run from SharePoint, SharePoint library must be mapped on the local system, while the syncing is paused.
Follow the steps to install and run BudgetLink from SharePoint.
Steps
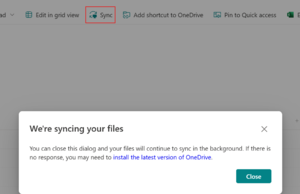
- Login to SharePoint and click on Sync button.
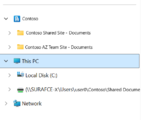
- The SharePoint folder will be visible in your File Explorer, under Quick Access section.
- BudgetLink cannot access files stored on the cloud.
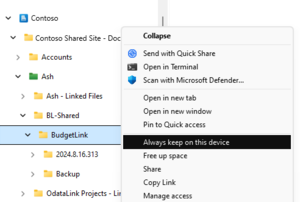
- Right Click on the synced Folder and select "Always keep on this device".
- This would force BudgetLink to access the required files from local system.
- Download BudgetLink from here
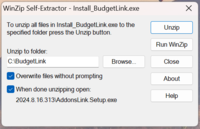
- Unzip to Local C:\ Drive.
- A BudgetLink Installation Wizard will open.
- Accept the Terms and Conditions and click Next.
- Select "Install on a Shared Network Drive" radio button and click Next.
- Browse to the SharePoint folder mapped on your system.
- Click on Install.
- After installation is complete, an Add Trusted Location dialog box will be displayed.
- Click on Yes to automatically add trusted location.
- On the first run, BudgetLink will ask to enable Macros. Follow this support note for steps.
- BudgetLink can't run while OneDrive is syncing files and folders.
- Click on OneDrive icon in your taskbar, a OneDrive sync pop up will be displayed.
- Click on the gear icon in the top right corner.
- Click on Pause Syncing drop-down menu, and select the required period to stop syncing.
- Restart BudgetLink.


