
| Version Number | Version Date | Milestone | Notes |
| 3.35.0.84 |
5/07/2013 |
Category Budgeting | Categories Added the ability to budget by categories. Created standard table for categories called STANDARD_Categories1 Updated Profit and Loss Report Pack to work by categories. Added detail categories data validation dropdown. Drilldown: Enhanced drilldown to handle categories. Enhanced drilldown to always include budgets dynamically so get data is not required when editing budgets and wanting to drilldown. Enhanced for filters to not impact reports. Assigned the drilldown filters a category of “Drilldown”. |
Author Archives: Admin
Pay Invoices by Credit Card using PayPal
To pay your invoice/s using your PayPal account or credit card, enter your invoice number below and click Pay Now. If paying multiple invoices, enter each invoice number separated by spaces in the Invoice Number field below.
You will then be re-directed to the PayPal site. Enter the invoice amount and your account details to process the payment.

Feedback posted on the MYOB C4C Forum on 9-7-2013
Hi All:
Thought I would give some feedback on our client experiences with Accounting Addons – their services and their support and follow through. I know most of you – as with me – would not recommend a third party provider unless you had some feedback on what they were like.
We have used Jeff and Nic recently to:
- Combine all Inactive cards for a number of our clients – into the one card. We are talking in one instance around 2,700 Inactive cards – made the clients’ lives so much easier on a number of levels
- Replacing invalid or incorrect emails on all cards where relevant – up to 2,000 in one instance. (As you would know, with the MYOB Import, you cannot replace a field with a blank field. In these cases we ranf client MYOB Customer databases through a programme which showed all incorrect email addresses. Prior to finding Jeff and Nick, our only option was to replace these email addresses with something like “invalid” in the email field and use that to import and update – very manual process to then go in and delete say 1,000 or more “Invalid” emails in MYOB
- Restoring and combining MYOB files where – in one case – 2 users had been using one file – the other 12 or so had ben using another copy – Jeff and Nich saved the client’s bacon on this one!
- Purging sales transactions (selective), inactive items and inactive cards where a client’s MYOB file was almost 2GB and they were unable to even open
- Automating a process for one client where they needed to bill a Head Office account for up to 100 separate stores (a number of these instances) but wanted to be able to track sales against the individual stores – a brilliant solution!!
I cannot speak highly enough of their service, and their follow through – they have become an integral part of our offering to clients. And our clients are always so appreciative to us for making the introduction. Please feel free to contact me off life with any additional questions
Cheers
Cathy
Cathy Allington
Managing Director
You Grow Pty Ltd
PO Box 886 Millicent. SA. 5280
T: 08 87331885
M: 0416 203 966
E: Cathy.Allington@yougrow.com.au
W: www.yougrow.com.au
How to change the default currency from $AUD to $NZ
The default currency in BudgetLink is $AUD. Follow the steps below to change to $NZ:
From the BudgetLink Menu go to Settings > Currencies
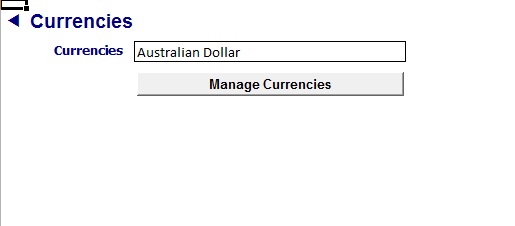
Click Manage Currencies
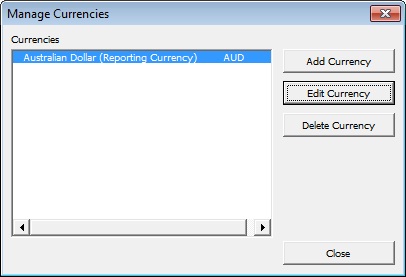
Click Edit Currency
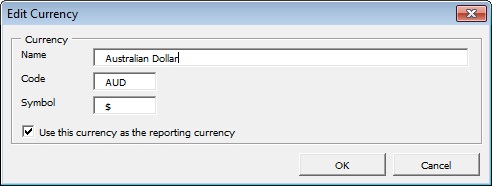
Edit the Code field from AUD to NZ
Click OK
Click Close
How to add a custom report to BudgetLink
Background
BudgetLink reports are Excel workbooks with formulas and some buttons
All Workbooks saved into the BudgetLink\System folder will appear in the BudgetLink menu
If you have been sent a BudgetLink report please follow the instructions below add it
- Start BudgetLink and answer all the prompts until the get data has run and the screen is waiting for you to choose a report.
- In the menu, Go to the 35. Help entry
- In the menu, Click on the Links entry
- Click on the link next to the system folder. It will open up windows explorer.
- Download the file attached to the email into that folder.
- Extract the contents of the zip file into the system folder
- Delete the zip file afterwards.
- Go back to the menu, The new reports/s should appear
How to Register BudgetLink
If you have chosen to subscribe to the Ultimate Edition the first step is to Purchase a BudgetLink Monthly Subscription.
Once the purchase has been completed the next step is to register BudgetLink. To do so please follow the steps below
If BudgetLink is closed:
Start BudgetLink
The BudgetLink Licensing form will appear
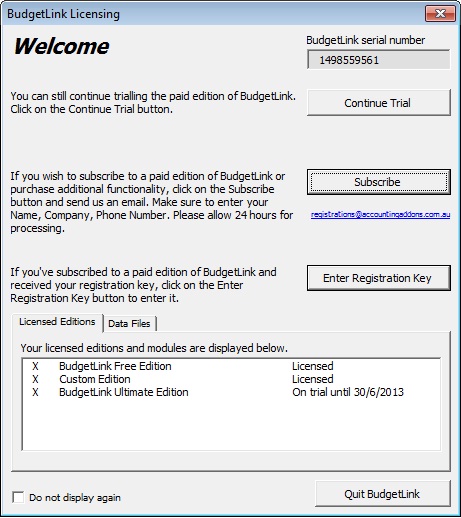
Click Subscribe
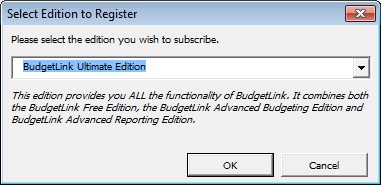
Choose the Edition to subscribe to and click OK
An email form will appear as below
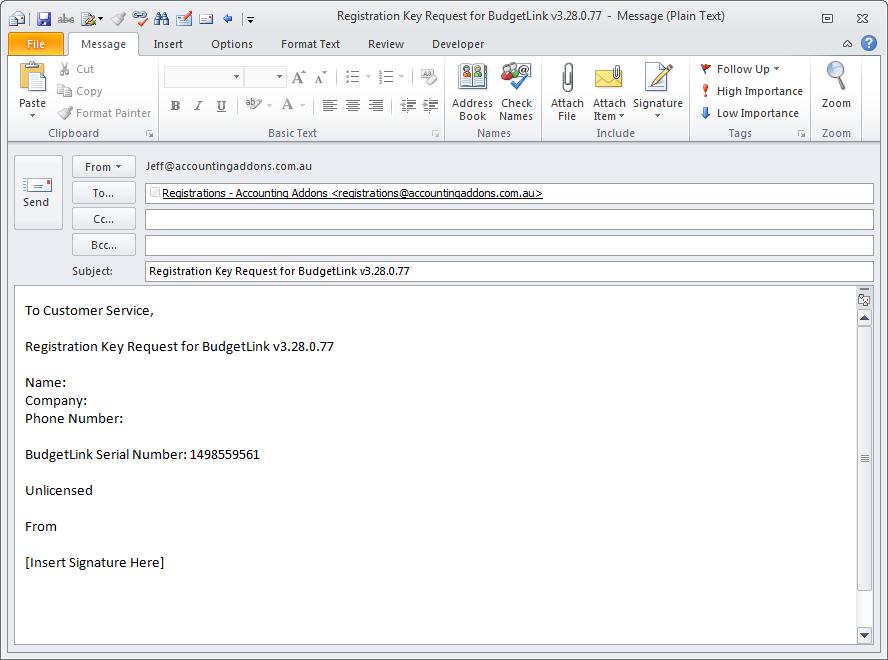
Complete the email form fields and click Send
Please allow up to 2 hours turn around during business hours for a response.
How to set-up Reckon Accounts (Quickbooks) for integration with BudgetLink
You will need to ensure the list of accounts and classes are unique.
For classes, simply ensure the names are unique at all levels. Quickbooks allow things like CLASS 1 as a header, followed by CLASS 1 as a detail of CLASS 1. Although it names it internal as CLASS 1:CLASS 1, our product has issues with situations like this.
The same applies with accounts. With accounts, they may or may not use Account Numbers. Account Numbers have to be unique, so if they use those, great. If they do not use account numbers, then the account names MUST be unique. I’ll use Interest as an example. You could have a structure that looks similar to this…
INCOME
……….INTEREST
EXPENSES
……….INTEREST
While the internal names of the two interest accounts are INCOME:INTEREST and EXPENSES:INTEREST. Quickbooks does not provide us that detail and instead passes only the word INTEREST to us when giving us values. Hence we cannot determine which of the two interest accounts it relates to, same issue as with classes, but easier to understand this way). Again, the individual names must be unique on the whole structure.
To remedy, simply rename the accounts to be …
INCOME
……….INTEREST RECEIVED
EXPENSES
……….INTEREST PAID
Newer versions of BudgetLink (which you have) will detect and warn when those problems arise, but it is easier to remedy before hand as you won’t be wasting your time cleaning up their classes or accounts during the setup.
How to configure the Ratio’s report
Some customisation must be done on the report to configure it correctly as each MYOB chart of accounts is unique. To configure the ratios, follow these steps.
1) Open the ratios report and customise it.
2) Notice the “Addins” tab in the excel ribbon. Click on it.
3) Notice the Green Plus and Red Minus in the Addins Ribbon. Click the Green Plus to show all the hidden rows.
4) Enter your account numbers to represent your various assets, etc., in the cells in yellow.
5) Once done. Click on the Red Minus to hide these cells.
6) Click on the customise to check the numbers.
7) If everything looks good, you will need to save the changes in the workbook. Click Save (standard excel save) and click the UPDATE button when prompted. Wait a bit, and next time you open the report up, it should have remembered your accounts.