Creating a new account hierarchy from scratch
Jump to navigation
Jump to search
Overview
BudgetLink has the ability to have multiple account hierarchies which can be used to control the layout of your accounts on your reports.
Creating an account hierarchy
To create an account hierarchy, follow these steps. If using security, you must be logged in as the administrator before being allowed to create an account hierarchy.
- From the main Menu in BudgetLink, click on 30. Settings;
- Click on Accounts item in the menu;
- Click on the Manage Account Hierarchies button;
- Log in as the Administrator if prompted;
- Click the Add Account Hierarchy button;
- Select the Template to use as a starting point and click OK;
- Enter a Name and Description for the account hierarchy;
- Tick the checkbox Default Account Hierarchy When Consolidating if you want this to be the default hierarchy;
- Tick the checkbox Use Account Hierarchy with jobs if you want to be able to use the Job Filter when reporting this Account Hierarchy
- Tick the checkbox Use Account Hierarchy with Categories if you want to be able to use the Category Filter when reporting this Account Hierarchy
- Tick the checkbox Display Unmapped Accounts on Reports if you want to ensure your account hierarchy should always include all accounts;
- For each type of accounts, select the tab and click the Add Accounts to start building your account hierarchy;
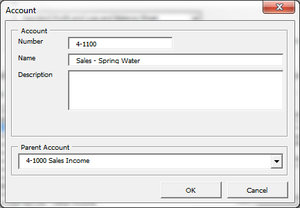
- For each account you add, enter the Number, Name and Description for the account and choose the Parent Account if applicable;
- Click OK to save and close the Acccount dialogue;
- Click OK to save and close the Account Hierarchy dialogue;
- Click Close on the Manage Account Hierarchies dialogue.


