Adding a data warehouse
To add a data warehouse, follow these steps.
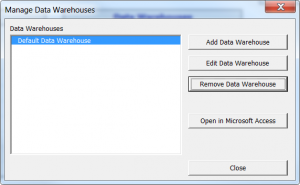
- From the Menu, click on the Manage Data Warehouses button;
- Click the Add Data Warehouse button in the Manage Data Warehouses dialog box that appears;
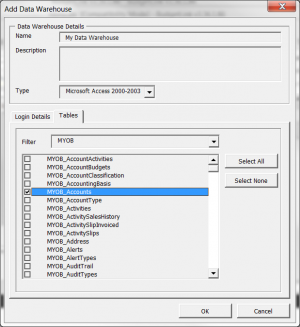
- In the Add Data Warehouse dialog box that appears, enter the Name and Description for the data warehouse;
- Select the type of database to use. We recommend you use Microsoft Access 2000-2003 unless technically proficient with other databases;
- Under the Tables tab, select the tables to replicate. You can filter the list of tables based on the source data file you want to automate;
- Once all information is complete, click OK.
- The new data warehouse will appear in the Manage Data Warehouses dialog box. Click the Close button.
To fully create the data warehouse and populate it with data, you must perform a Get Data. Once the Get Data process has run, you will find your new data warehouse in the ODBClink System Folder. You can now open this data warehouse and add any additional queries or business logic you need.
Video
This getting started video will show you how to add or edit data warehouses within ODBClink.

